Setting up Duplicati on OpenMediaVault5
Backup Approach
In order to provide robust backup of family photos and videos I have the following setup:
- NAS-attached 1 Tb drive - primary location for storing and sharing files on home network
- NAS-attached 1 Tb drive - local backup of primary drive
- Backblaze Cloud storage - provides non-local backup of file
The NAS-attached drives are connected to a RaspberryPi running OpenMediaVault. In order to schedule and execute local and cloud secure backups Duplicati is additionally installed.
OMV4 to OMV5
Previous versions of OpenMediaVault have provided the ability to install “extras” (like duplicati) that are run directly on the raspberrypi (in host debian OS). As of OMV5 a docker-based strategy has been adopted to better seperate “extras” and associated dependencies. This is a significantly better approach given challenges in managing different aspects of RaspberryPi OS vs. specific applications like duplicati.
As an example - recent versions of duplicati have required TLSv1.2 which is not supported via installed libraries of RaspberryPi OS. This has led to issues where duplicati has stopped working for remote backups due to issues connecting to SSL-secured APIs.
Installing RaspberryPi OS
You will need to install the latest RaspberryPi OS onto your SD card. As we will be using our Raspberry Pi primarily as a network-attached storage device we should install Raspberry Pi OS Lite version.
The latest IMG files can be downloaded and then written to your SD card via a utility like Etcher (recommended over the RaspberryPi Image utility).

Initial Pi Setup
For initial setup and network attachment we will need to connect the Pi to a keyboard and monitor. Once the below steps have been completed you can disconnect monitor and keyboard and connect to the headless Pi via SSH (default username: pi, password: raspberry).
Connecting to Wifi
We will need to configure the wpa client on the Pi to enable network connectivity:
sudo nano /etc/wpa_supplicant/wpa_supplicant.conf
And add the following lines:
network={
   ssid="network_name"
   psk="network_password"
}
More complete instructions can be found here.
Enabling SSH
We will want to access our Pi via SSH. We can use the raspi-config utility:
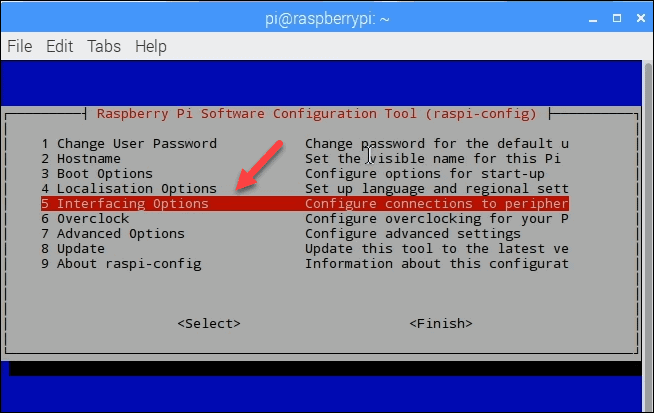
More complete instructions can be found here.
Installing OpenMediaVault
Installation of latest OMV can be execute via:
wget -O - https://raw.githubusercontent.com/OpenMediaVault-Plugin-Developers/installScript/master/install | sudo bash
Really good instructions on OMV installation, disk attachment and user-setup can be found here.
Enabling Docker/Portainer (OMV-Extras)
Now that OMV is installed we can enable the OMV-Extras functionality which includes Docker and Portainer a UI for Docker management).
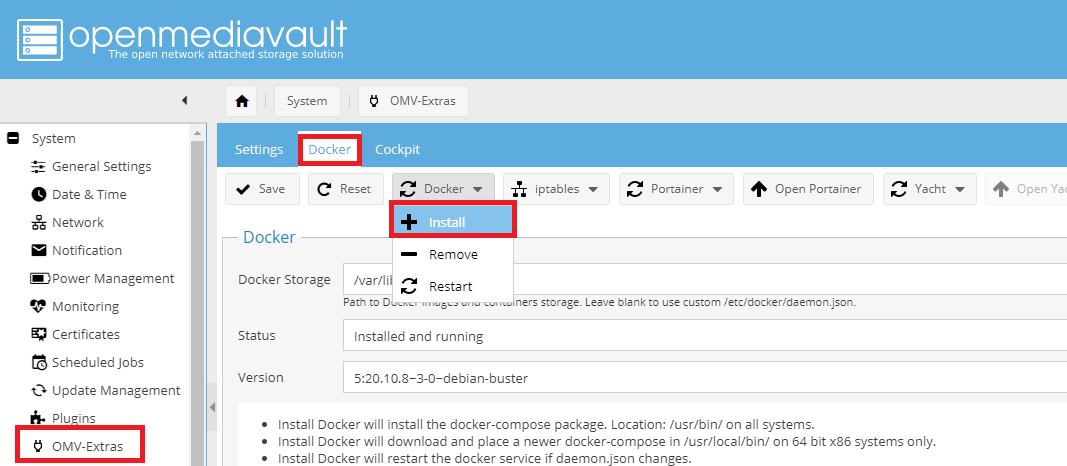
For both Docker and Portainer choose the Install options and wait for installation to complete.
Duplicati container setup
Add Container
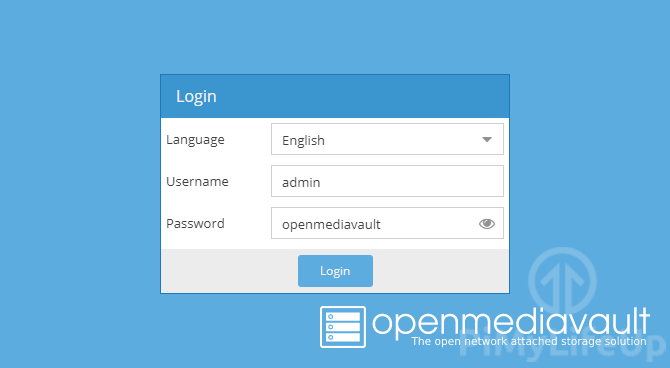
Login to portainer interface (e.g. https://raspberrypi:9000), select local Docker and then Add Container:
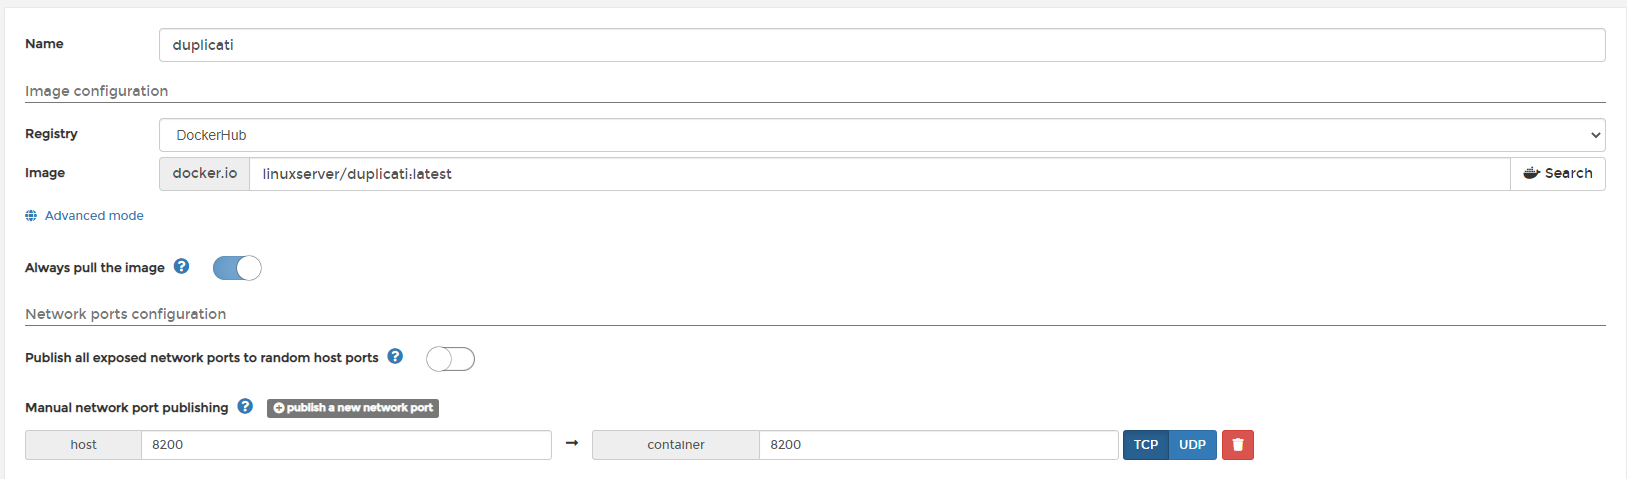
Set Image
Specify docker image as linuxserver/duplicati:latest and map host port 8200 to container port 8200 (or choose an alternative host port if you want to access duplicati on another port).
Map Bindings
In the Advanced Container settings specify bindings between local (host) system and container to indicate the data you want to backup and the locations for backup.
- /source - location of data that you will backup
- /backups - location where backups will be stored
If you do not specify volume bindings they will be automatically created to default locations (e.g. in picture above /backup was used so /backups was automatically created).

Env Variables
Specify the following environment variables:
- PGID = 1000
- PUID = 1000
For more information on PG/PUID see here.

Restart Policy
Change Restart policy to Unless stopped.
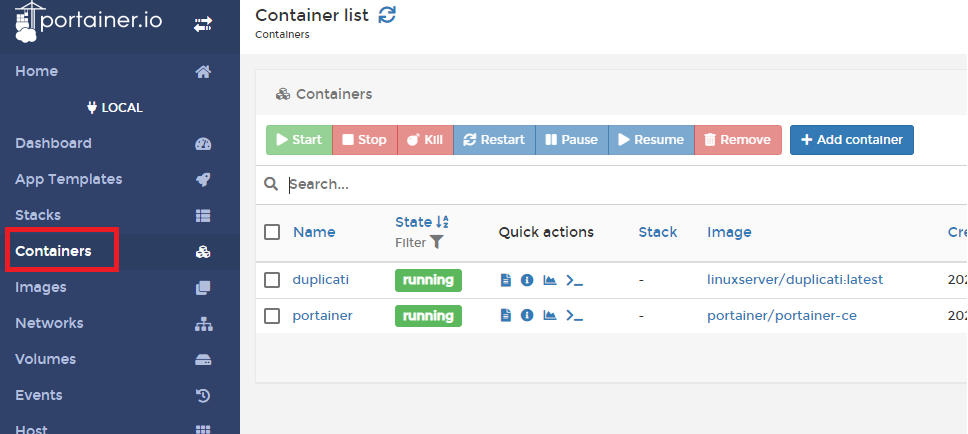
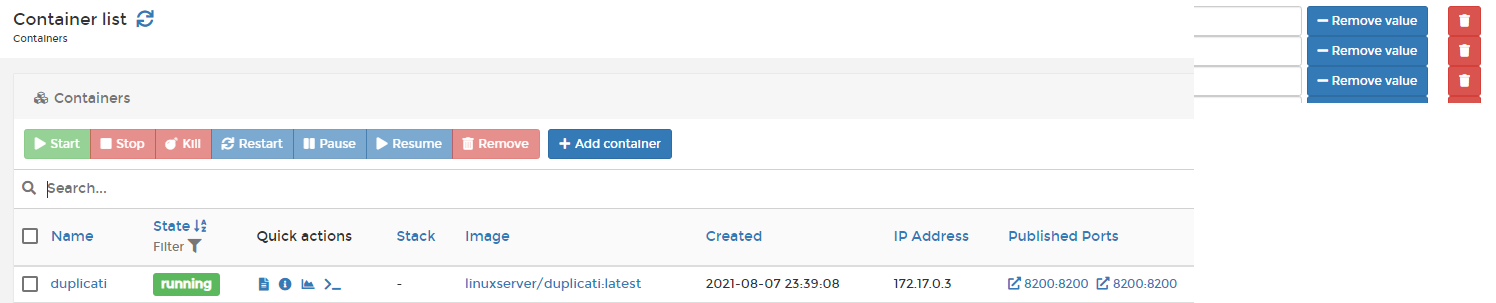
Deploy Container
You should now be able to Deploy Container. Once container is deployed you will be able to see it with status running in the container dashboard view:
Backblaze Account creation
Backblaze is a low-cost backup storage provider. Other provides like Azure, etc. are also supposed by Duplicati but I have generally found BackBlaze (B2) to be most cost effective.
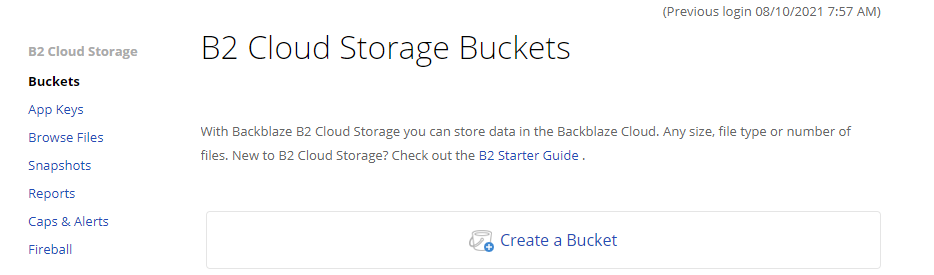
Account Creation is fairly straight-forward:
When creating account make sure to record Backup codes as these will be required to access account if your MFA stops working!
- Create a new bucket (e.g.
duplicati-backup-[name]) - bucket names are globally unique so you may need to play around awhile before you find one that works.
- Generate an App Key - this will be used by duplicati to read/write to your bucket.
Store the keyId and applicationKey values somewhere as you will need them for duplicati configuration.
For more details on account creation and duplicati setup see here.
Duplicati configuration
Configuration in duplicati involves:
- Add backup
- Select B2 Storage type
- Specify Source files and backup frequency

More details can be found here.
Depending on the size of your files it may take several days for the initial backup task to run, after that backups should only be incremental files that are added.
For my setup I have 2 tasks that run:
- Local backups (from 1 external drive to another) - every 2 days
- Remote backups (to B2 cloud storage) - every week